My New Homelab!

My "Production" home lab has been a stack of three SFF Optiplex 3050 computers for a while. It was nice because the computers were free from work. We just finished a massive PC refresh and Optiplex 3050s don't comply with Windows 11 Requirements so they had to go following PCI Compliance guidelines.
They are really good machines to get into Homelabbing because they're cheap on the used market, usually around $50-$100 depending on how barebones you want them AND they have plenty of room for activity.
I had one with a GPU, 8TB Hard Drive, and an extra 1 Gigabit NIC that was running Proxmox as a base, Graylog, Pihole, Truenas, and Jellyfin just to see what I could pack into one machine and it ran pretty well!
However, I didn't really need all that on one machine. I had three in the cubby after all. So I wanted to build a better lower power, lower profile set up.
What Did I Need?
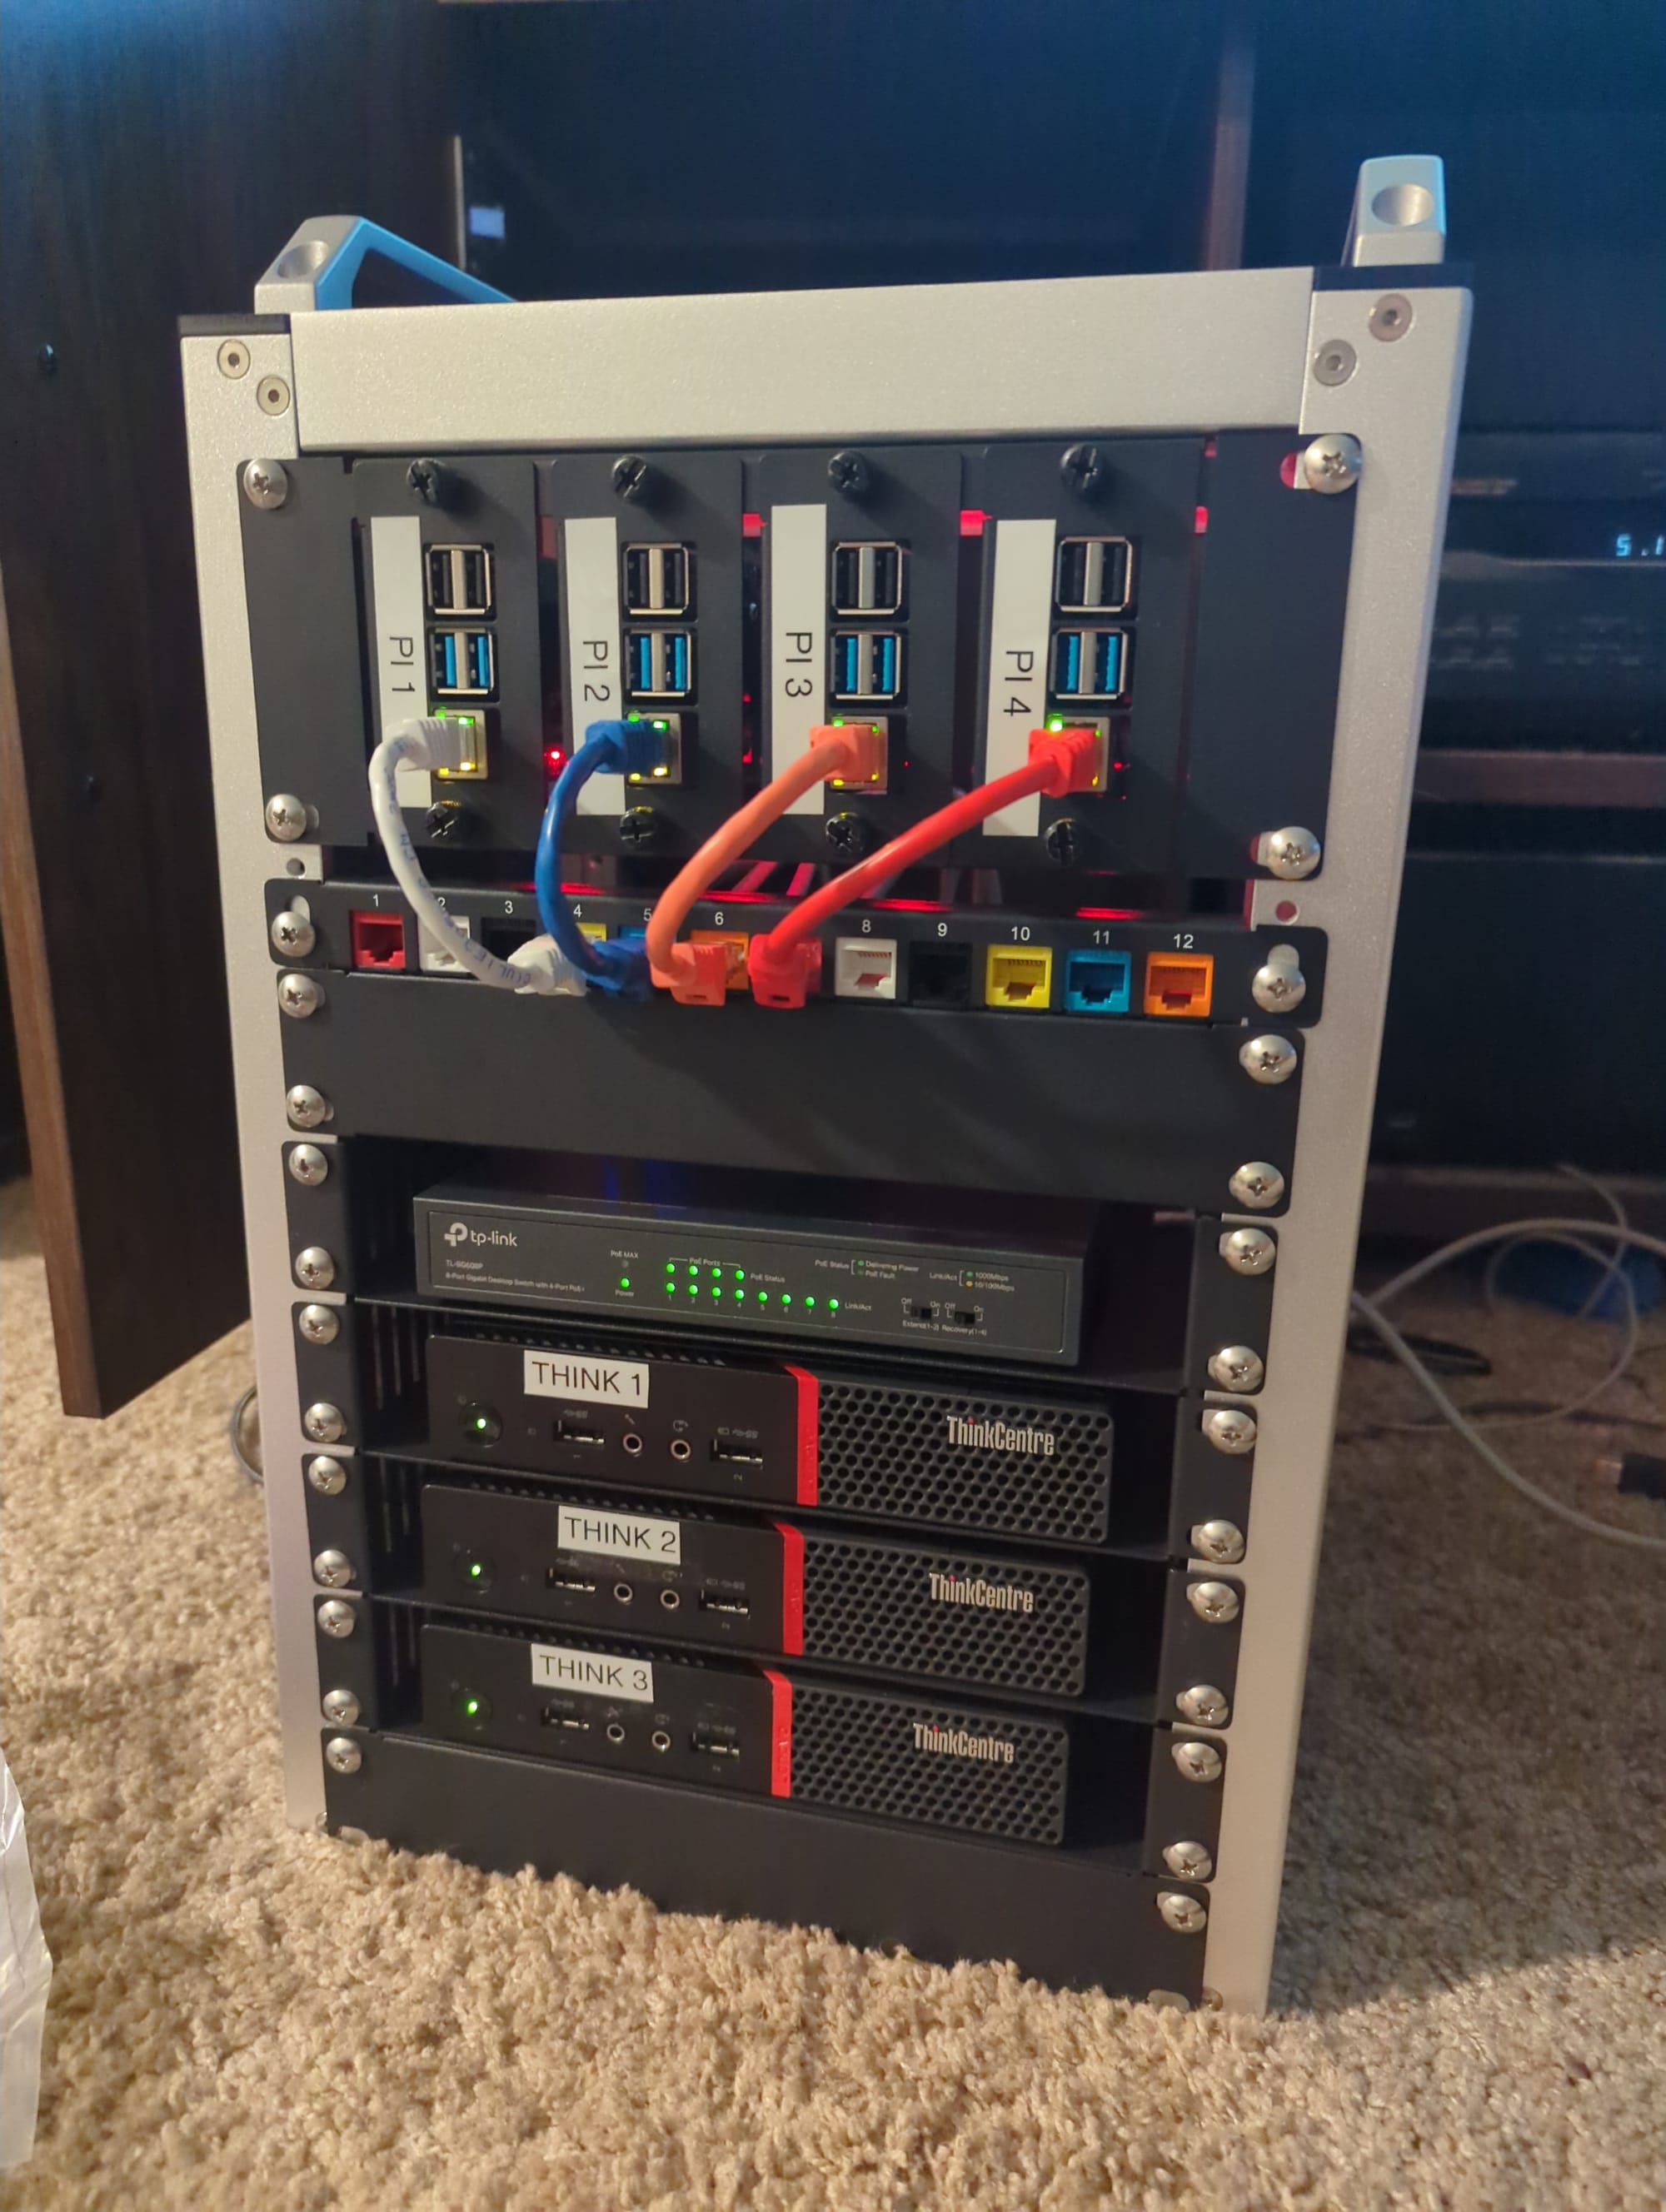
When I started planning the new build I knew two things. 1) I didn't need GPU or NAS functionality. I have a UAT Homelab that has a couple GPUs and a proper NAS with redundant disks which is much better than the single disks I could get into a SFF Optiplex. 2) I knew I wanted to also use a stack of Raspberry Pi 4b 4GB models I had in some way probably POE. 3) I need a new switch that can accomodate a bunch of Raspberry Pis over POE and a bunch of Mini PCs.
I knew that I would eventually turn towards a Tiny/Mini/Micro Form Factor PC. Funny thing about IT is I've fallen in love with these more capable thin clients. They're a nightmare in a dusty prod environment like a warehouse or workshop, but in my clean home? Perfect!
Then two great things happened at once. First I scored a sick deal on some Lenovo Thinkcentre Tiny M715q PCs with Ryzen 5 Pro 2400GE. Then I saw this post from my friend Jan Wildeboer on his site https://jan.wildeboer.net/2025/05/Cute-Homelab/
I had a use case a lot like his. My Prod Lab lives in the entertainment center in my living room because I'm in an apartment. It was also important to me to have a low power and therefor low heat build because my previous set up ran far too hot and had to be turned off for a heat wave.
It was also important that my new lab be very easy to take out of said cubby hole so that I could service it, swap out dead compute, upgrade, etc. However, Jan's choice of 10 inch rack is, not surprisingly, hard to find in the United States! I did find a few 3D printable parts and some rack rails online, but I haven't used my printer in a while and all my plastic was ruined during the last Kentucky heatwave thanks to the humidity. Buying all new plastic and/or a dryer wasn't really cheaper than buying a pre-made rack like this one that I ended up getting. https://52pi.com/collections/deskpi-shop/products/deskpi-rackmate-10-inch-8u-server-cabinet-t1-rackmount-for-network-servers-audio-and-video-equipment
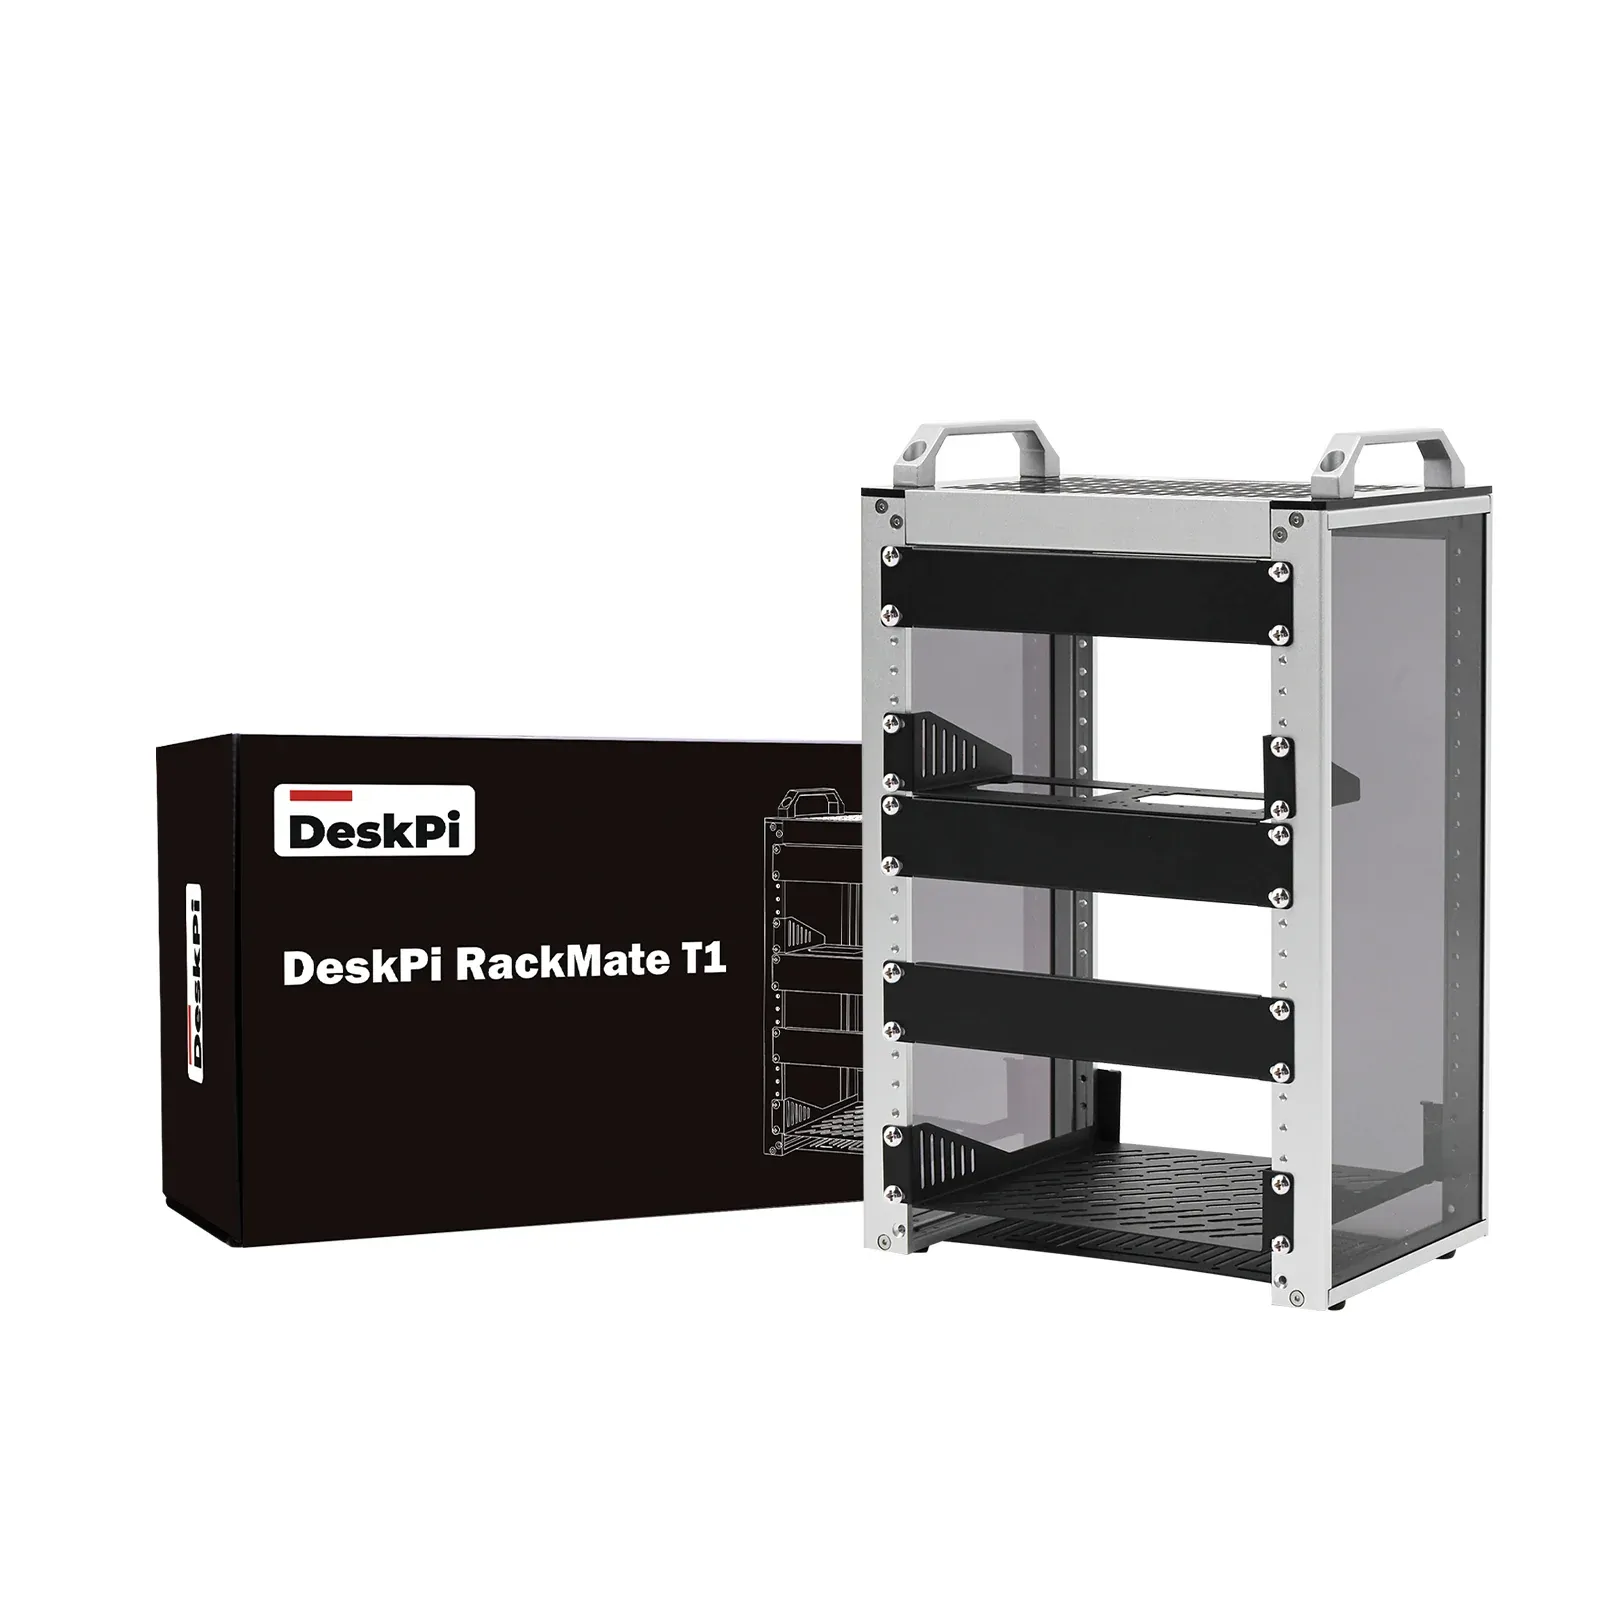
This was cheaper, or so I thought!
Turns out, I needed shelves and didn't realize they were pretty costly. I had to buy two shelves that fit my M715q computers and they were $20 each plus $50 for the Raspberry Pi Cluster and another $15 for the Patch Panel.
So it would have been cheaper to buy a filament dryer and a couple rolls of plastic to print a better solution. Not by much so I'm not really filled with buyers remorse, but for anyone reading this torn between 3D Printing and buying niche enthusiast equipment: it doesn't really matter cost wise!
I do think Jan's 3D Printed 1U racks for his Mini PC's looks great and I am printing my own now, but a hand me down Ender 3 is a wild beast to tame especially for prints longer than a day.
So with the rack and main compute figured out I needed to figure out Networking.
I had a POE Cisco Catalyst SOHO Switch I received from a friend a year ago that I wanted to use, but it turns out Cisco doesn't make a switch that fits in a 10 inch mini rack. So I made a quick trip to Best Buy and got whatever 8 port switch with POE I could find.
Lucky for me, this switch had all the fun blinken lights on one side and the cables on the /other with no blinken link lights. This makes everything very clean as I thought I would need the patch panel more. I was both disappointed that the patch panel was mostly a waste of money and excited at how nice it looked.
Finally I wanted to get a UPS just for good practice. I bought the same kind I use at work an APC BE425M. Should be plenty good for a system with a max pull of maybe 100 watts. The bigger issue for me is always going to be lightning protection. It seems odd but I have had two separate gaming rigs get destroyed by lightning in my life. I managed to revive the GPU from one with the toaster oven trick and I might talk about my time as a GPU repair guy at some point (COVID Hobbies).
And with that I was Done!
It brought me so much joy to see it fully blinken!
I had a lot of fun putting this together. I had a backlog of Jeff Geerling, Veronica Explains, and Craft Computing videos to catch up on when I started and unfortunately I only got about halfway through my play list before something went a little werid and I had to pause it to think.
I think I was most happy with the cable management on this rack. I obviously didn't have the room for proper cable trays. The patch panels aren't even hard wired, they're just a bridge really connecting two pre-made patch cables together. Yet I still managed to make a really nice zip-tied tail with all the cables so it's super easy to take this whole thing out of it's cubby.
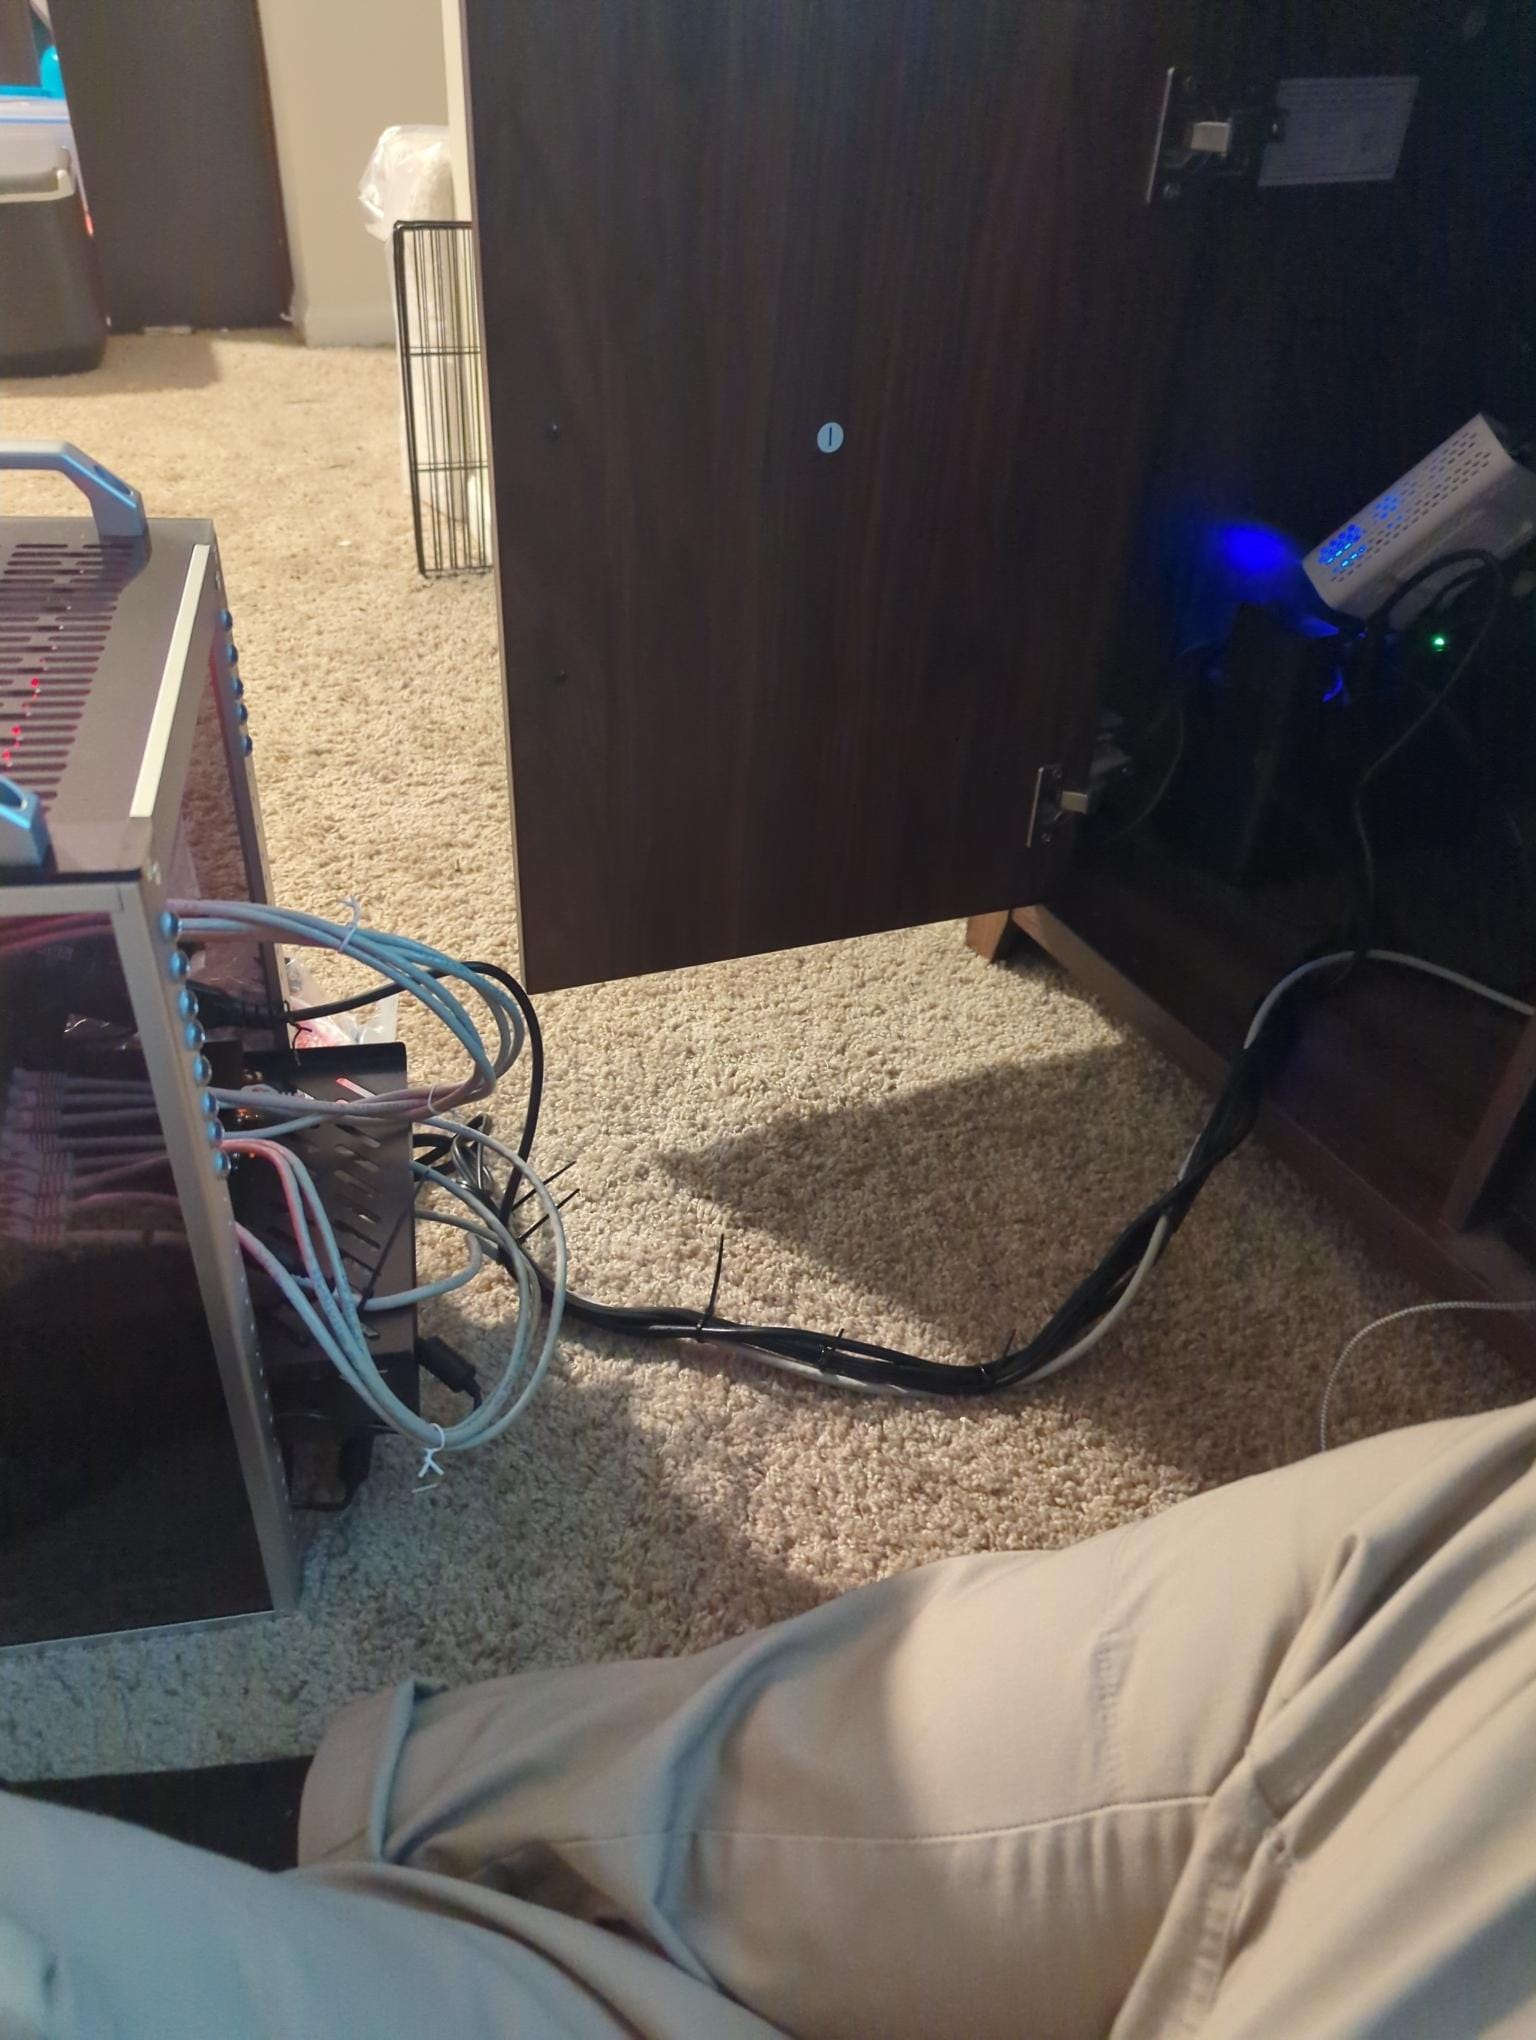
It's not pictured, but I did end up ziptying those grey patch cables down too. I wanted the bottom set to move pretty easily since I am able to pull the Mini PCs out from the front and just unhook the power and data cable with ease.
I know it's not great to have copper data and copper power cables so close, but my use case isn't that sensitive. Also, if you can see this site, it's good enough.
Its also on my projects lists to design a 1U 10 inch chassis for that switch so it doesn't move as much. It is also - believe it or not - zip tied down.
Software
I had the M715q Computers configured to always turn on when they have power and configuring them with Proxmox 9 was really fun actually because I own Lenovo Tiny-in-One monitors as part of my Work From Home setup. There is a compartment on the backs of those monitors designed for this style of mini PC so that it can be slotted in and take power, usb, and display from the monitor. It brings me joy because it reminds me of Star Trek or maybe Silo where they slot in a Isolinear Chip or old hard drive into a slot and then the computer gets data.
It feels cool in a way a turbo nerd would think it's cool is what I'm saying.
The Raspberry Pis are configured with the Pi image for Talos Linux because I'm wanting to learn to use Kubernetes. I don't think that's the best use for the Pis though as I think they should host their own services like a dedicated Pi-Hole would be fine. Or if I do use them for Kubernetes I think I should spin up more Talos instances in Proxmox so I can get used to configuring clusters without having to unscrew a bunch of Pis and re-flash them when I mess it up.
As for services running, I kinda prefer rebuilding my software stack whenever I do these Homelab builds. Migrating servers is cool and easy with Proxmox, but often I find I've learned a lot and can do better on a new set up. That being said, I'm committing this time.
This very blog is being hosted on my Homelab with a Cloudflared tunnel serving it publicly. I also have my Forgejo Git server running and another blog my fiance and I wanna start to review places we've stayed in our travels.
At some point I want to add Next Cloud and a SMTP mail server into the mix along with whatever I found on Lemmy's Self-hosted communities that day. Plane may be the correct next answer so I can practice Project Management type stuff, but I digress.
Thanks for Visiting!
I hope to have more updates with proper how-tos or at least explanations on how I configured things and why for future posts.
Thanks for the read!